Emails Checker makes your email verification very simple with a simple excel uploading form.
To get started make sure your email is verified. On logging in you will see a main blank screen with messages no lists found.
On the right corner of screen, you will see the button named Upload File. Click the button to start uploading your first list.
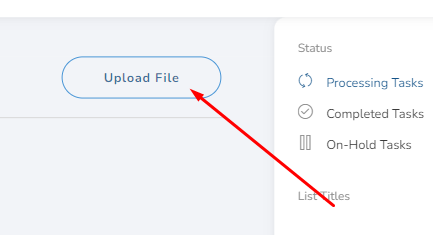
On Clicking Upload File you will see a popup modal that will ask you for your email verification list. The emails checker allows all types of excel files for verification like,
| Format | Extension |
|---|---|
| Excel Workbook | .xlsx |
| Excel Macro-Enabled Workbook (code) | .xlsm |
| Excel Binary Workbook | .xlsb |
| Template | .xltx |
| CSV (comma delimited) | .csv |
You can upload any of the above-mentioned files for validation. But to make sure your files have an EMAIL OR EMAILS column before your emails list start. as shown below.

You can download the sample file here.
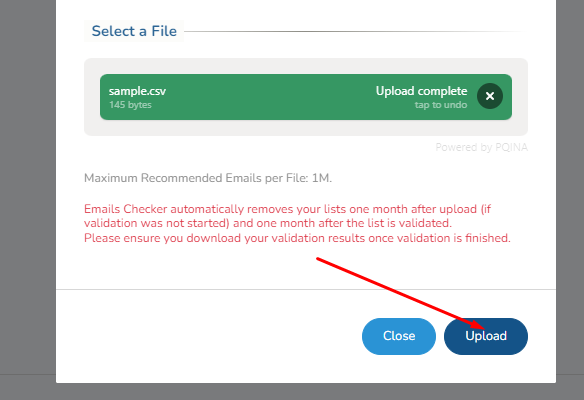
Once your file is ready you can upload that file in the upload popup modal.

By uploading the file you will see the green Upload complete message shown below. Once you see the green Upload Complete Message click the Blue Upload button to upload your emails on the Emails Checker.
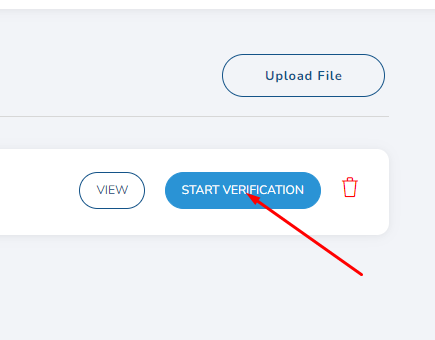
Don’t worry your emails list will not start verifying right away. Once the upload is done you will have to click the Start Verification button to start the verification process.
Just by following image-based steps, you can upload your first list within a minute. If you still need more help uploading the Files you can contact our live chat support team to get extra help.